Thursday, September 26, 2013

Half-Moon Mani

I've been wanting to try a half-moon mani for some time now.  A while back I saw this tutorial and decided to give it a shot this past week.  I didn't have hole reinforcers on hand, so I used some round labels and cut them in half.  I think the hole reinforcers would be better to work with though.  For this mani I used LAQA&Co Chubs for my base and Julep Ingrid, both scream fall to me!  Chubs is a polish I tend to use a lot; it is a light gold metallic and it is really easy to work with; full coverage with one medium coat.  Ingrid is a burnt orange crelly.  I really did not like the formula, it was difficult to get even coverage and seemed really thick, but I do love the color!


My labels weren't stuck on well at the edges of my nails, which is why I think the hole reinforcers would work better.  I also can't decided if I made the half-moon part too thick.  All in all, I really liked wearing this mani, and will definitely try it again with different colors and better tools (aka hole reinforcers)!

love,
B

dotticure rookie

I recently got some dotting tools from Cheeky Beauty Supply and decided to try them out!  For my first dotticure, I decided to go simple.  I pretty much just made up random designs for all 10 nails.  For this mani I used Julep Daria and Color Club Put a Pin In It.  Daria is a smokey grey cream that has some blue to it in certain lighting and Put a Pin In It is a rose gold metallic.


the dotting tools are double sided, so the 5 tools allow for 10 different dot sizes
The dotting tools were really simple to work with.  I put a few drops of my accent color on a piece of foil and used that to dip my dotting tool.  The hardest part was having a steady left hand to do the dots on my right hand.


I topped everything off with a coat of Seche Vite.  Overall, I am really pleased with how this design turned out.  I will definitely be trying some more complex dot patterns in the future!

love,
B

Wednesday, September 18, 2013

Blog Catch Up Post!!!

Sorry for my absence lately!  Things have been so busy I haven't had a chance to add my manis to the blog.  Here is what has been going on mani-wise for the past week or so:

1) Gator Mani
Kunimitsu Lucky Goldfish- sheer blue jelly with copper/orange glitter; opaque in 3 coats
Zoya Pixie Dust Dhara- textured bright orange pixie dust; opaque in 2 thin coats
Glossy Glam top coat- a new standard in my mani routine

the game did not go so well...but I was loving this mani! GO GATORS!!!

2) Rica True Blood Collection- Shifter
First of all, I am absolutely in love with this polish.  I love black and I love grey.  This is both (it is a thermal color changing polish). Oh, and by the way...it is also a beautiful holo that shines "bright like a diamond" in the sunlight.  The application was a dream.  Two easy coats and it was perfection.  I finished it off with a Glossy Glam top coat and I was done.  I wore this mani for several days because I just did not want to take it off.  I also got Fang Banger and Blood of Lilith from the Rica True Blood Collection.  I have not tried them yet, but I probably will sometime this week.  I am also lusting after the rest of this awesome collection.  You can find it on Justricarda on Etsy.  Re-stock will be live this Friday (I think).  Check me out on instagram (@bianca788) for a video of Shifter changing colors!

not the best picture, but I love that you can see the sparkle! 


3) Zoya Pixie Dust Carter- royal purple textured pixie dust; opaque in 2 coats
and...I did not photograph this mani. fail.  I love this color so much that I wore it for my bachelorette weekend.  Next time I use it, I will definitely make sure to take a picture of this sparkly gem.

4) Pretty & Polished When Hearts Kaleidoscope- raspberry glitter packed crelly from the Pretty & Polished Fall 2013 collection; opaque in 2 coats

I used Gelous to smooth out this polish and then added a coat of Seche Vite on top.

I love all the berry and gold glitter particles! 
This concludes my monster blog post! Sorry for the major delay in posting these, but I can't promise that it won't happen again ;)

love,
B


Wednesday, September 4, 2013

Safety Pin Stamped Mani

Here I go with another attempt at nail stamping.  I think I am improving?!  For this mani I started off with TheHungryAsian Cookies & Cream.  I love this polish!  It was a bit sheer; I needed three thin coats to get the desired coverage.  I probably should have read the suggestions on the Etsy listing and added a white base coat (shame on me!).  Either way, this color is beautiful and I can see myself ordering a full size bottle of it. 

I describe this polish as "yummy"...and now I want ice cream!!!
This polish is gorgeous on it's own, but I had to add a little flair.  I decided to use the safety pin stamp from my Cheeky 2013 jumbo stamping plate "Top of the Class".  I don't have a solid black polish (gasp!) so I went with butter London Chimney Sweep (a metallic charcoal grey).  This time around I stamped all my nails, which was a little more challenging than just stamping one or two.  I think this came out pretty good.  Not all my safety pins are perfect, but I am happy with the overall look.  I definitely noticed that it was harder to stamp with the butter London polish than it was with the special Konad stamping polish I've used in past manis, but it was not impossible.

 
I topped all this off with a coat of Seche Vite.  I can't wait to do a mani with Chimney Sweep on it's own because it is so gorgeous!

love,
B    

ncLA Designer Nail Wraps

This past Monday I tried ncLA nail wraps for the first time.  I ordered a few from Amazon and was really exited to try Aly En Vogue first!  To start I cleaned my nails with a cotton ball soaked in 100% acetone just to make sure there were no particles on the nails.  Then I started opening the kit.  Here is a picture of what a set of nail wraps looks like:


Aly En Vogue is a really pretty vintage floral pattern, and probably something I would never be able to recreate with regular polish (my nail art skills are nowhere near that good)!  The kit comes with 22 nail wraps (enough for 2 manis and a few extra), a nail file (not the glass one pictured here), and instructions.

The wraps are not difficult to apply, and I found them to be pretty sturdy, but they were hard for me to size.  I often would pick a size that was too small to cover my whole nail, so I messed up a few by doing that and had to peel them off and start that nail over.  I also found them to be thicker than other nail wraps/appliques I've tried (Incoco).  This was good because they were sturdy but also bad because I think it made them wrinkle more.  I also ended up painting my thumb nails with Julep Clara because the tops of the wraps were too rounded to fit my thumbs (maybe my thumbs are oddly shaped!?).

side note- i love essie apricot cuticle oil! 


Overall, I love how the design looks, and it was definitely a quick way to get a really cute mani.  The fact that you have no dry time is also wonderful if you are in a rush!  I wish these wraps were a little thinner and that they fit my thumb nails, haha.  I like the idea of having extra wraps in each kit for another mani, or even to use as accent nails for a more subdued look.  Have you tried nail wraps?  What do you think about them?

love,
B

Monday, September 2, 2013

Li-Lacquer & Glossy Glam

Happy Labor Day!

As I've mentioned, my obsession with indie polishes grows by the second!  One Etsy store that has stolen my heart is TheHungryAsian.  She has GORGEOUS polishes and most come in a mini version ($4.50) as well as a full size ($9.25).  I love the option of the mini bottles because they are adorable, and give you the opportunity to try more colors.  They are also great as gifts!  I dare you all to order a polish from TheHungryAsian just to enjoy her adorable packaging and personal thank you notes!  It's those details that just get me.  I've ordered quite a few polishes from her, but the first one I had to try was Li-Lacquer.  Li-Lacquer is a lilac cream polish with beautiful multi-colored hexagonal glitter flecks.  I am in love.  This is cute for summer, and I'm already dreaming about how cute it will be for Spring and right around Easter.  The formula is great; it was opaque in 2 coats and had pretty good glitter distribution.


For this mani, I used one of my favorite base coats- Butter London's Nail Foundation.  It dries matte and is truly nice enough to wear alone.  It gives your nails a natural polished look, and provides the perfect base for any mani.  For my top coat I used Glossy Glam by justricarda on Etsy.  Glossy Glam is easily climbing the ladder to become my favorite top coat.  It dries quick, provides a nice glossy finish,  and it is easy to work with because the formula is not thick.  I definitely recommend trying it!


That's all I've got for now.  I'm spending Labor Day sick on the couch, but maybe I'll work up the energy to do another mani.  Li-Lacquer is so pretty that I don't want to take it off :)

love,
B     

Thursday, August 29, 2013

NailsByBG- Gameday Lacquer

I've been thinking about some polish ideas lately, and last night I got to making my first polishes!  I have 5 polishes (all mixed last night) that I LOVE, but only one to reveal on the blog today.  This is Swamp Life, and of course it's a gator blue polish with two different types of bright orange glitter - perfect for game day!

awkward hand pose
Swamp Life - Gameday Lacquers by NailsByBG
I will be posting more colors from the Gameday Lacquers Collection very soon, so stay tuned!
GO GATORS!

love,
B

Monday, August 26, 2013

"Back to School" Theme Mani

This is the first year that I will not be going "back to school" (thank God!).  So, to cure my longing for school supply shopping, I gave myself a back to school mani.  For this mani I used Essie Pretty Edgy and Mod Lacquer Nonpareils (another recent indie polish purchase...I think I'm addicted).  Pretty Edgy is a kelly green; to me it it's the perfect preppy color with a twist.  Nonpareils is a sheer milky polish with multi-colored glitter (read: this makes your nails look like vanilla fro-yo with sprinkles on top!).

the mani line up
I also used Cheeky nail plates in "Top of the Class" for my paper clip and protractor stamps.


This mani was really simple to create, and it was also my first time using Gelous as a top coat for my glitter nails.  It did a fine job of giving me a smooth finish, but Nonpareils is not very chunky, so I quickly realized that this was not a good polish for me to test Gelous out.  I will write another Gelous post when I use a chunkier glitter polish.


After a few hours I didn't really like the look of Nonpareils on top of Pretty Edgy, so I took that off and applied Nonpareils by itself.  It took me three coats to get the coverage I wanted, but the result was great!  I want to redo all my nails right now, but I'm holding back!

this is the fro-yo & sprinkles look that I LOVE

Be sure to check out Mod Lacquer on Etsy.  They have some awesome polishes, and they come in mini size too!  I love the mini size because it allows me to try more lacquers without the commitment or cost of a full size bottle.

Happy Mani Monday!
love,
B

Saturday, August 24, 2013

Gomez, my first indie!

How could I not try 
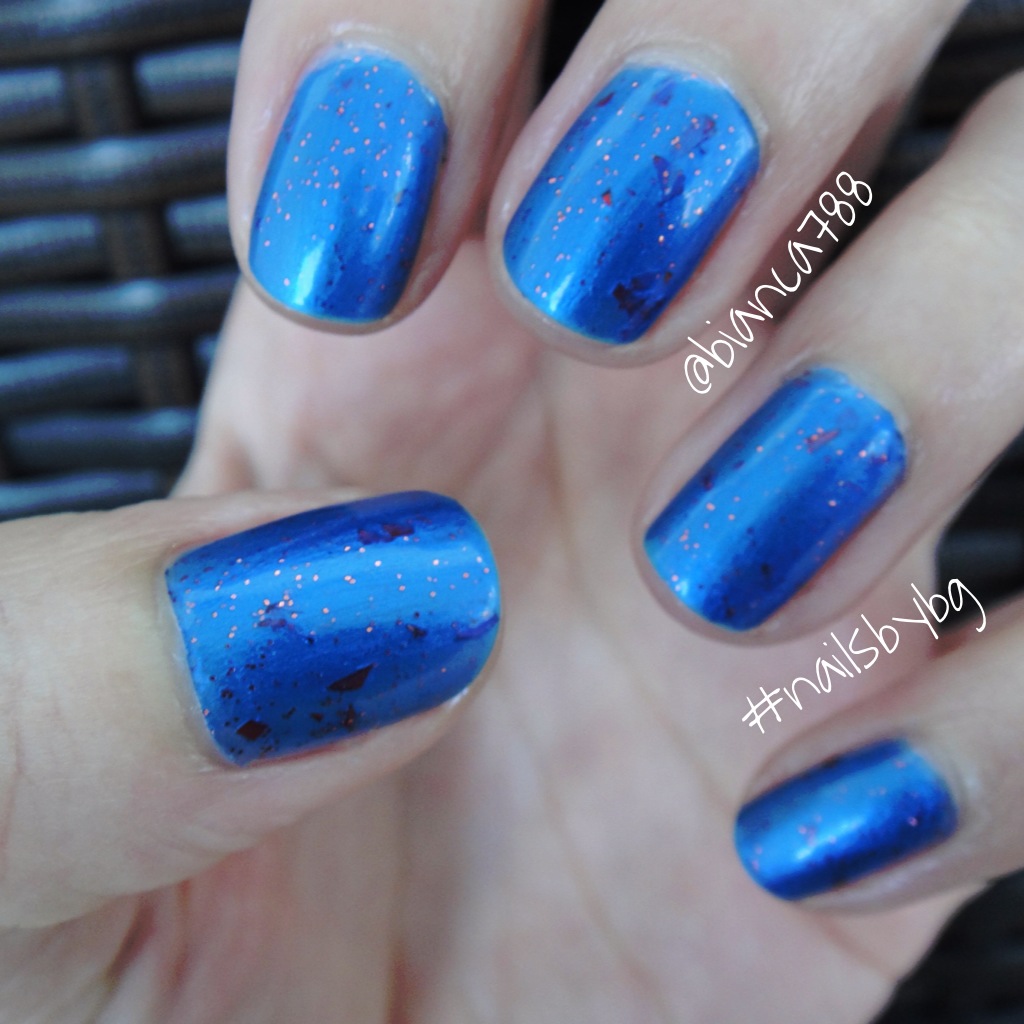
CrowsToes in Gomez as my first indie nail polish color?!?  It is my last name, plus it's a gorgeous glitter-packed indie!  I used LAQA&Co. Chubs as my base.  This is a simple light gold shimmer polish that I thought would make Gomez really shine.  Just FYI, Chubs is a dream to apply, and is great for a quick mani.  It is not streaky at all.  Gomez is a jam packed glitter polish with blue, black, chrome, and gold multi-size glitter particles.  Gomez would look great alone, or on top of other base colors (aka "undies") like blue or black!  

Gomez & Chubs
 I first applied a base coat, then 2 coats of Chubs.  I followed that with 2 coats of Gomez "dabbed" onto my ring & middle finger.  I followed that with 1 coat of Seche Vite for all my nails, and an extra thick second coat on the Gomez nails just to smooth out the texture and lock in the glitter.


Personally, I don't think the pictures do this mani justice.  It is so sparkly and dynamic in person! I loved it.  Here are some tips for applying a glitter heavy polish like Gomez:

1) Do not brush from top to bottom like you would with other polishes, this will only move all the glitter to the bottom of your nail.
2) I recommend dabbing some polish on different parts of the nail, and dragging the glitter around until you have the whole area covered.
3) Wait a while for that first coat to settle, then add a second coat for more glitter coverage on any spots you think need more glitter.
4) You can never have too much glitter!
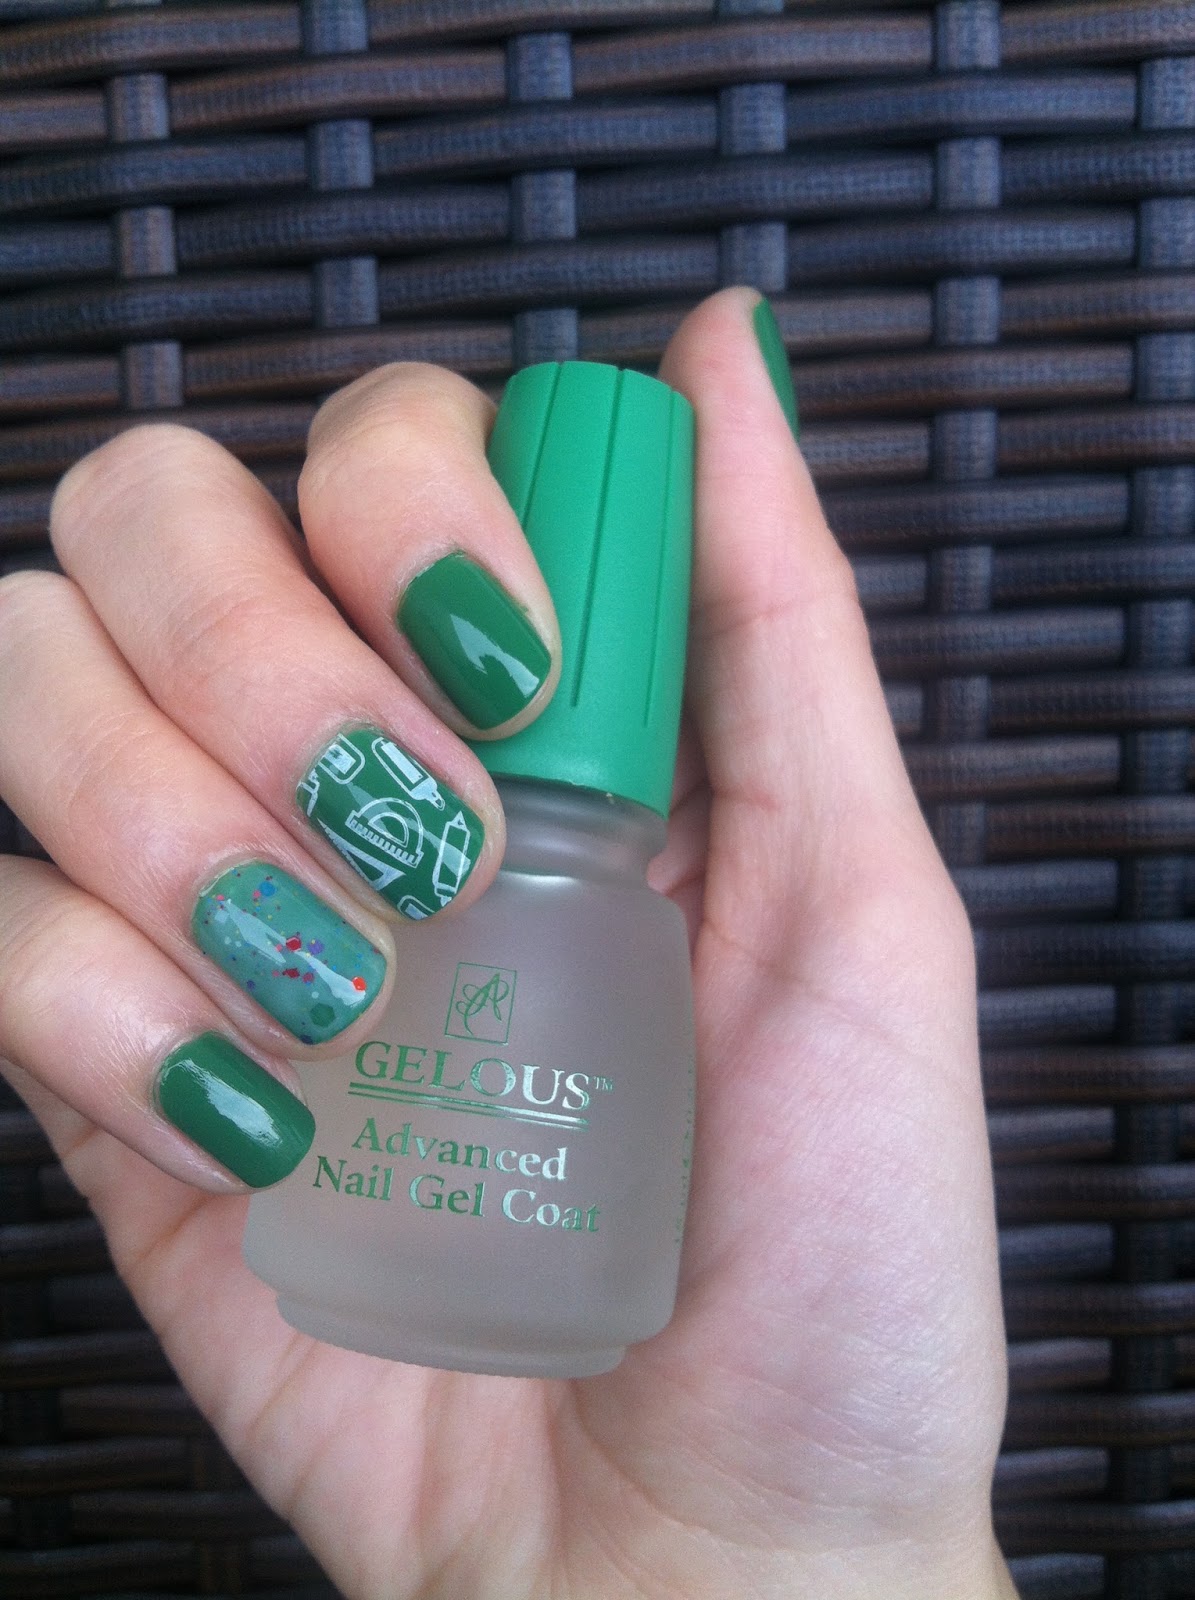
5) Have a really great top coat on hand, I recommend Seche Vite, to seal in your glitter and give you a smooth finish.

love,
B

P.S. I got lots of nail mail today, and I will be sharing more soon!!!

Tips & Tieks

It's pretty obvious how much I love nail polish, but another great love of mine is Tieks.  Simply put, these are the best flats I have ever owned.  Now, don't get me wrong, they are pricey, but when I break it down into cost per wear, they are TOTALLY worth it.  In fact, I'll even be wearing Tieks on my wedding day!  Make sure to check them out, and I mean come on, the Tiek blue soles on all the flats are to die for.
Slate Grey Croc Tieks & Julep Mischa
Anyways, onto the nail polish review.  This is Julep Mischa, I got it as part of my Picnic Mystery Box.  It is described by Julep as a cherry scarlet micro-shimmer.  In some lighting I agree with this description, but in other lighting it looks more fire red/orange.  I love that about this color, it really changes depending on the lighting.  Here is another picture:

More posts coming soon!
love,
B  

Monday, August 19, 2013

Indie Polishes

Hey...I've been on the hunt to try some cool indie polishes.  Stay tuned!

love,
B

Sunday, August 18, 2013

Navy Stamped Mani

Second try at stamping...much more successful! The secret: patience.

I have really been wanting to try Julep - Char, so I decided to try it today and add some stamping details.  I have barely even had time to go through all the stamping plates that came in the Cheeky Vibrant Collection, so I started going through them and quickly decided on this rosy/rope-looking stamp.  Here are some pictures of the tools I used for this mani, followed by some tips on stamping!

Deborah Lippmann - Turn Back Time is a miracle worker...FYI

Cheeky Vibrant Collection stamping plates and the Konad stamper
Tips (from a beginners perspective):
1) Use a good base coat- if you're putting in all this work for a fancy mani, you want it to last!
2) Complete your base color as usual, but skip the top coat for now; you want to wait until after you are done stamping to add the top coat
3) WAIT...let the two coats of your base nail color dry completely! I waited 30 min before stamping just to be safe
4) Have all your tools ready- I had 100% acetone & a clean-up brush on hand to clean my plate and scraper in between stamps
5) Don't overload the stamping plate with nail polish; that just leaves more for you to clean up
6) Work quickly once you have transferred the pattern onto the stamper so that it transfers onto your nail with ease
7) Wait just a few min before adding your top coat...why? you don't want your nice pattern to smear!

the final product

Hope you enjoy the post! If you have any stamping tips let me know!

love,
B
    

Tuesday, August 13, 2013

Julep Picnic Mystery Box!!!

I absolutely LOVE getting packages in the mail, so I when I heard about Julep's Mystery Boxes, I knew I had to get one.  They have options for a regular mystery box ($24.99) and a big mystery box ($39.99).  I figured, go big or go home...obviously.  This box was called the Picnic Mystery Box, and all of the picnic boxes include a limited edition color (Evie).  Another great perk is that one lucky box has a $1,000 visa gift card!  I didn't win the $1,000, but I am really satisfied with my box!

my big picnic mystery box!
I got seven Julep polishes and an adorable set of three mini lipsticks.  Here is a description of all the polishes:
Layne: sheer french pink
Clara: opaque peach
Lauren: hot tropical pink cream
Evie: raspberry micro-shimmer cream
Mischa: cherry micro-shimmer
Dianna: mint green cream
Fina: sky blue metallic

yay! new polishes, and no repeats
I tried Evie first, so here are some pictures in different lighting.  It is a beautiful raspberry color and is great for the end of summer and transition into fall!


Overall, I am really satisfied with my mystery box, and can't wait to try the other new colors.  I will certainly try a mystery box from Julep again in the future.

love,
B